
 Pin it
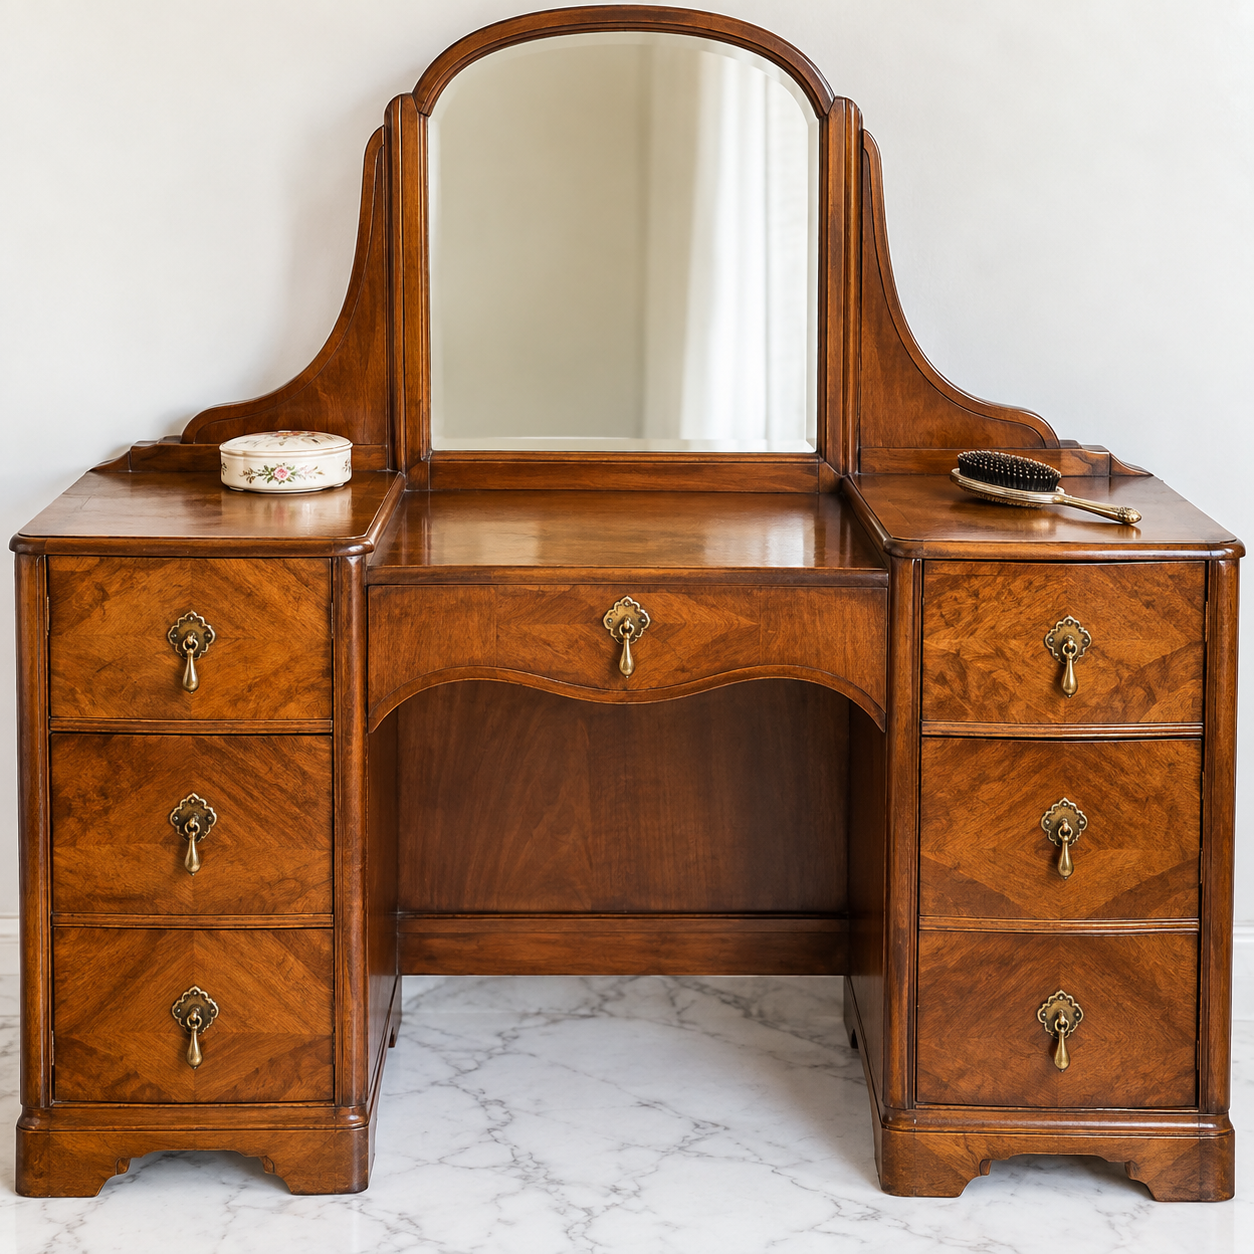
A 1942 vanity table usually has a story before you ever touch it. The mirror may be cloudy at the edges, the veneer may lift in tired strips, and the brass pulls often look darker than you remember. That does not mean the piece is done.
The best restoration starts with restraint. Clean it, study what is loose, save what can be saved, and only strip or sand when the surface truly needs it. A steady hand matters more than a fast one here.
Materials that respect the piece
Gather the supplies before you open the first drawer. Vintage furniture rewards a clean setup, good light, and tools that let you work in small controlled passes.
If the vanity has any old paint or unknown finish, review the EPA lead-safe DIY guidance before sanding or scraping.
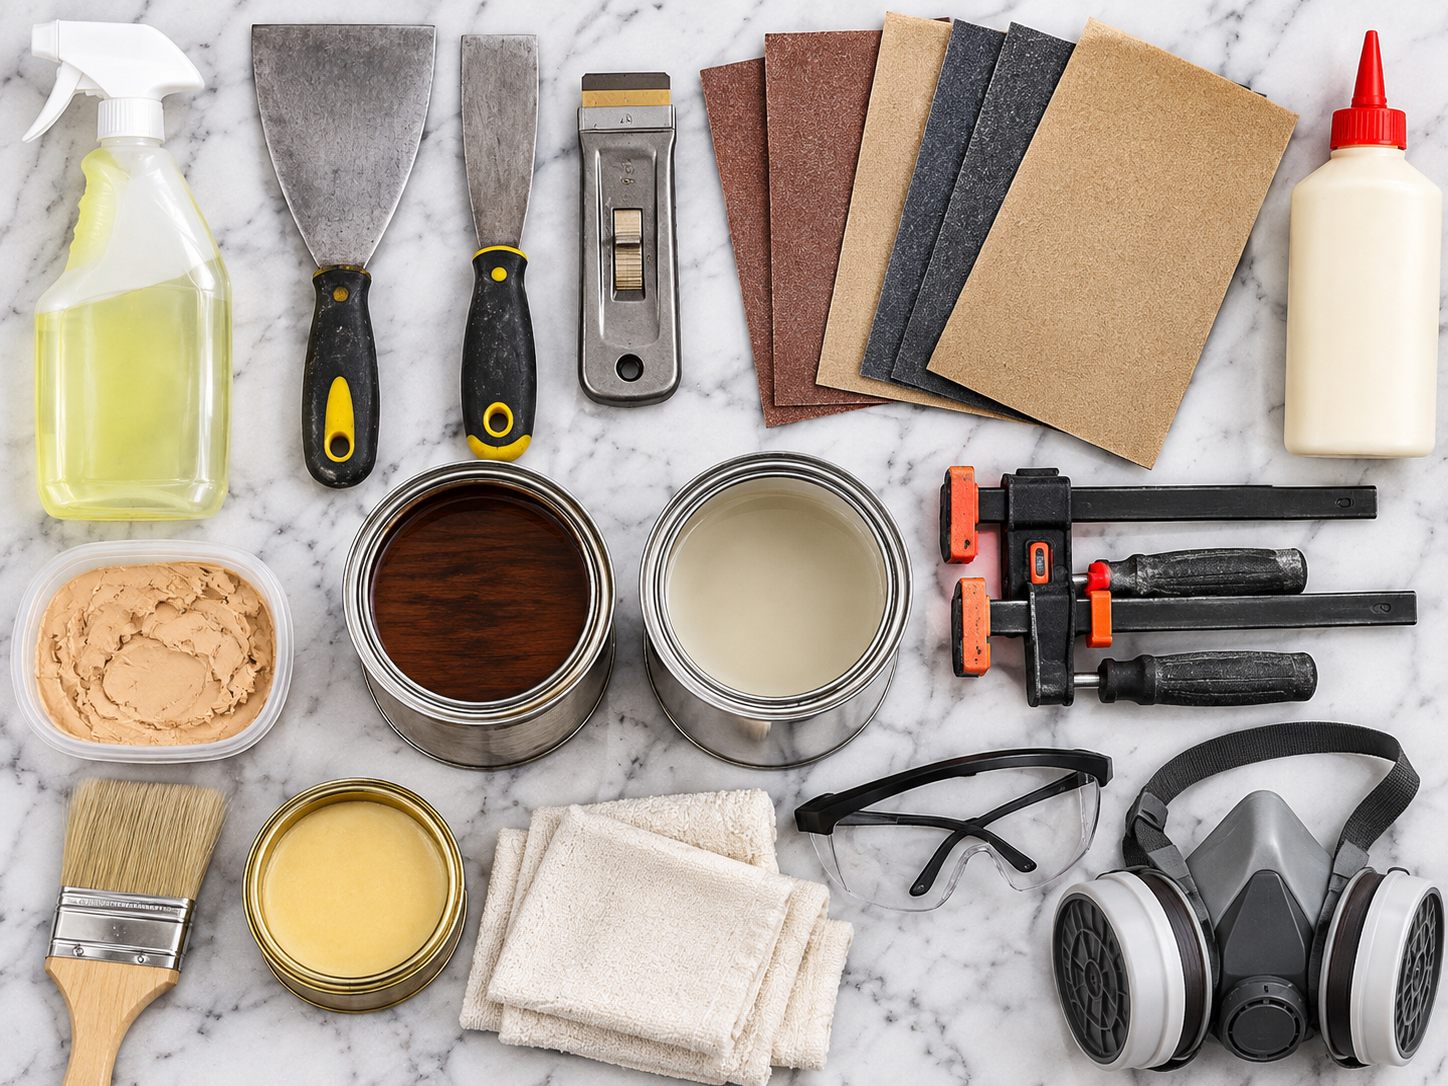
- Mild cleaner. Removes waxy grime, hand oils, and dust so you can see the real condition of the finish.
- Putty knives and a razor scraper. Help lift loose veneer in thin sections without tearing into the base wood.
- Sandpaper in stages. Coarser grits level rough patches, while finer grits prepare the surface for stain or paint.
- Wood glue and clamps. Secure loose veneer edges, drawer joints, and small trim before any finish goes on.
- Wood filler or epoxy putty. Fills deeper dents only where damage distracts from the final look.
- Stain or primer and paint. Sets the final color after the old surface is clean and even.
- Satin polyurethane. Adds a washable protective layer without making the vanity look plastic.
- Brass cleaner and soft cloths. Freshen original pulls while keeping their aged detail visible.
Giving a 1942 vanity new life
- Inspect the bones. Pull out the drawers, check the legs, tighten screws, and note every loose veneer edge before you choose a finish plan.
- Clean before sanding. Wipe away old residue with a mild cleaner and let the wood dry fully. Sanding grime into the grain makes the next steps harder.
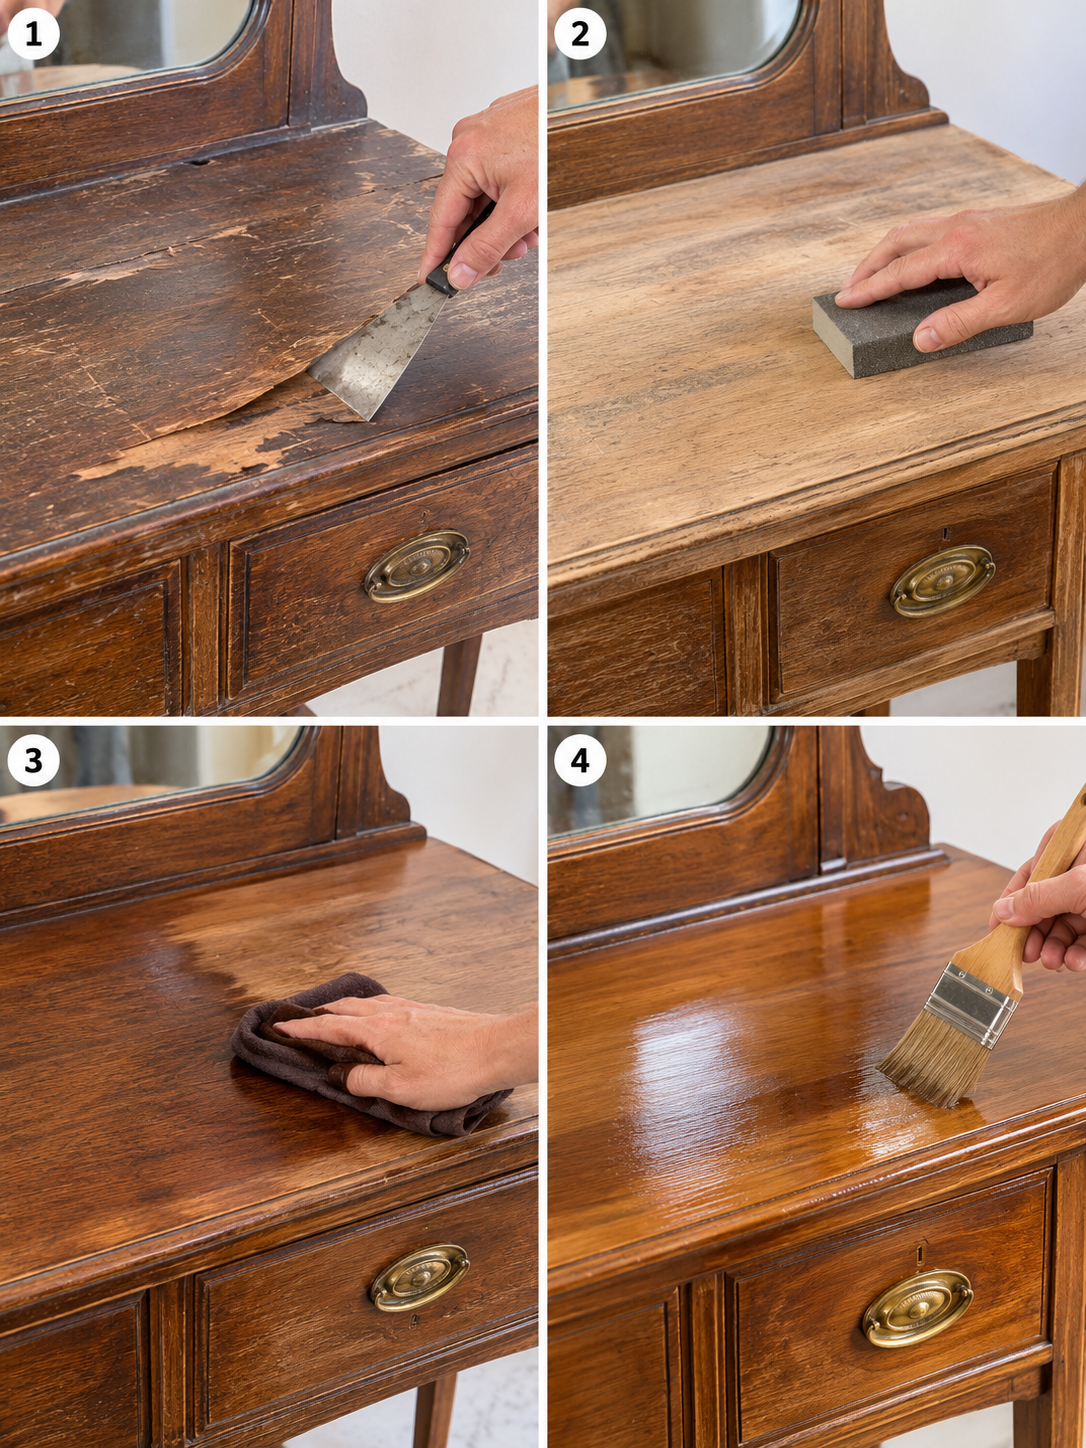
- Lift damaged veneer carefully. Slide a thin putty knife under loose sections and work with the grain. Stop when the veneer becomes firmly attached again.
- Sand in patient rounds. Start only as coarse as needed, then move through finer grits. Benjamin Moore notes that sanding with the grain and removing dust are key steps before restaining furniture, as explained in this wood furniture refinishing guide.
- Repair the small flaws. Glue loose trim, clamp weak joints, and fill only the gouges that will bother you once the vanity is finished.
- Apply color in thin layers. Test stain or paint inside a drawer first. Mixed woods can take stain unevenly, so a sample spot saves regret.
- Seal and cure. Brush on thin satin polyurethane coats, sanding lightly between coats if the product calls for it. Let the finish harden before loading the top with mirrors, jars, or trays.
Keep the old details
The charm of a 1940s vanity is not only the shape. It is the curve of the mirror support, the drawer rhythm, the worn brass, and sometimes a maker stamp tucked underneath. Before replacing anything, photograph the piece from every angle. Those photos help when you reinstall hardware or rebuild a missing trim line.
If you enjoy reading age clues in older things, the same habit applies to vintage photographs. This guide on spotting authentic 1970s details in old photos is a useful reminder to look at materials, hardware, and small background signs before jumping to conclusions.
The veneer decision
Loose veneer is frustrating because it comes off in uneven patches. Some strips lift cleanly. Other spots fight you one crumb at a time. Heat can soften some adhesives, but it can also damage nearby finish or loosen areas you planned to keep. A thin scraper, patience, and shallow pressure are often safer for a small vanity.
Do not assume bare wood is always better. The Canadian Conservation Institute explains that original finishes and surfaces can carry historical value, and heavy stripping may remove information that cannot be put back. Their wood furniture care guidance is worth reading before you take an aggressive approach.
Sanding without regret
Sanding is where many vintage pieces lose their crisp edges. Use a block on flat areas and keep your hand light around curves, carved trim, and drawer fronts. Stop often and wipe away dust so you can see what is really happening. If the vanity has mixed woods under the veneer, expect stain to land in several tones. That can look beautiful if you plan for it.
A vanity belongs in the kind of room where details affect comfort. Once it is restored, think about placement the way you would think about where people sit at a table. This piece on choosing a table seat that helps connection is not about furniture repair, but it has the same practical lesson. Position matters.
Finish that can be used
A vanity is not a museum case. It will see makeup brushes, hair tools, perfume bottles, and water drops from rushed mornings. Satin polyurethane is a sensible finish because it gives protection without a high-gloss shine. Four thin coats look cleaner than one heavy coat. Let the final coat cure well before setting anything on top.
Use trays under bottles and avoid leaving damp towels on the surface. The same everyday moisture caution behind making a bed with slightly damp sheets safely applies here too. Wood and trapped moisture do not get along.
Hardware and mirror care
Original handles can look dull at first, then come alive after a careful clean. Remove them from the drawers so cleaner does not smear into the fresh wood. Polish lightly if you want shine, or simply buff with a soft cloth if the darkened patina suits the vanity.
For the mirror, clean the glass gently and avoid soaking the edges. Old mirror silvering can be fragile. A little age around the edge is often better than a new mirror that feels wrong for the piece. If you like vintage personal-care objects, this guide to identifying a vintage metal hair curler pairs nicely with a restored dressing table.
Summary
The safest vintage vanity makeover keeps the structure, hardware, and character intact while renewing the surface enough for daily use.
Frequently Asked Questions
- → How do I know if a 1942 vanity table is worth restoring?
Look first at the frame, legs, drawer boxes, and mirror support. Loose veneer and dull finish are repairable, but deep rot, badly split legs, or a twisted frame may need a furniture repair pro before you refinish.
- → Should I remove all the old veneer?
Only remove veneer that is loose, bubbled, crumbling, or beyond repair. Sound veneer is part of the piece and often gives vintage furniture its finer grain pattern. If you do remove it, work slowly with a putty knife and avoid gouging the wood underneath.
- → Can I paint instead of staining the vanity?
Yes, paint is a good choice when the wood underneath is mismatched, patched, or too blotchy for stain. Use a bonding primer, sand between coats, and keep the original hardware if it suits the shape of the vanity.
- → How long does this kind of vanity restoration take?
A light refresh may take a weekend. A full veneer removal, sanding, staining, and four thin topcoats can easily stretch over several days or longer because each stage needs drying time. The hands-on work is only part of the schedule.
- → How do I clean old brass handles without ruining them?
Remove the hardware before cleaning it. Start with warm water and a soft cloth, then use a brass cleaner only if you want a brighter shine. Test one hidden spot first because some vintage pulls have a mellow patina worth keeping.
- → What should I use to protect the finished top?
For a vanity that will hold bottles, brushes, and daily clutter, a satin water-based or oil-based polyurethane is practical. Apply thin coats and let each one dry as directed. A coaster or tray still helps prevent rings from perfume, water, or skincare products.
References
Reliable references aided in composing and refining this content.
- https://www.epa.gov/lead/lead-safe-renovations-diyers
- https://www.benjaminmoore.com/en-us/interior-exterior-paints-stains/how-to-advice/interiors/restaining-furniture
- https://www.canada.ca/en/conservation-institute/services/care-objects/furniture-wooden-objects-basketry/basic-care-furniture-objects-wood.html