
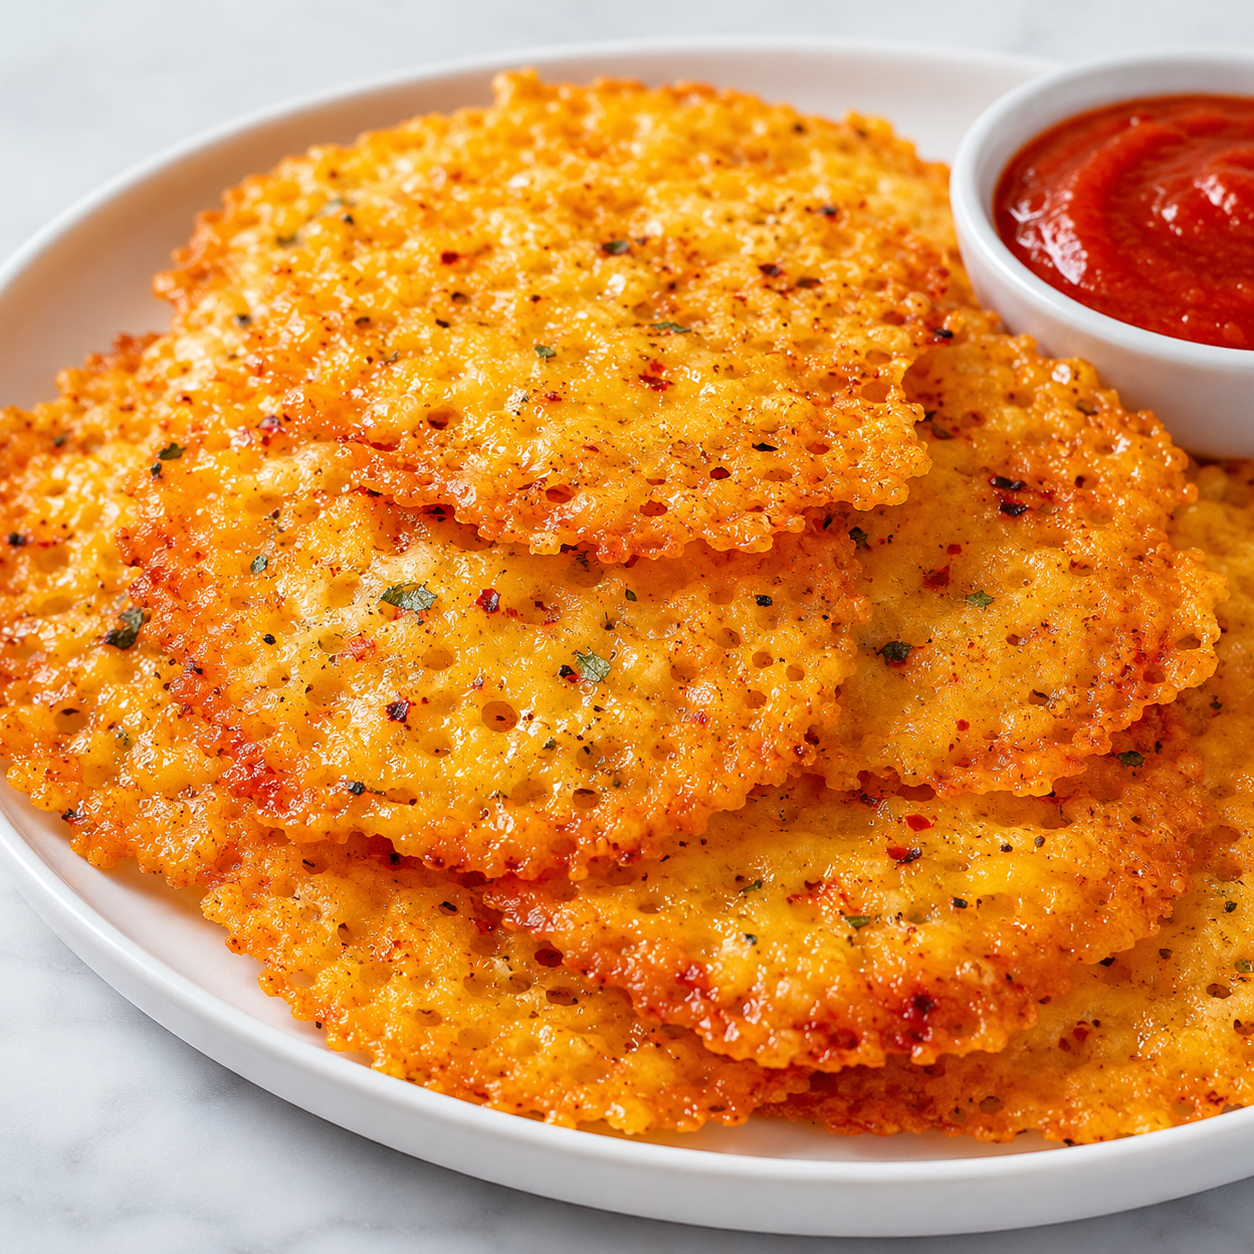
 Pin it
Baked Cheese Chips are what I make when I want something salty and crunchy without opening a bag of crackers. The oven does most of the work. Small mounds of cheese melt, bubble, brown at the edges, and firm up as they cool.
I like a mix of sharp cheddar and Parmesan because cheddar gives the snack that deep cheesy flavor, while Parmesan helps the chips dry into a cleaner crunch. Season them lightly. Too much spice can fight the cheese.
The Cheese That Snaps
Use cheese with enough fat to melt smoothly and enough salt to taste good on its own. A cheddar and Parmesan blend gives these Baked Cheese Chips crisp edges, a savory center, and a little nutty bite.
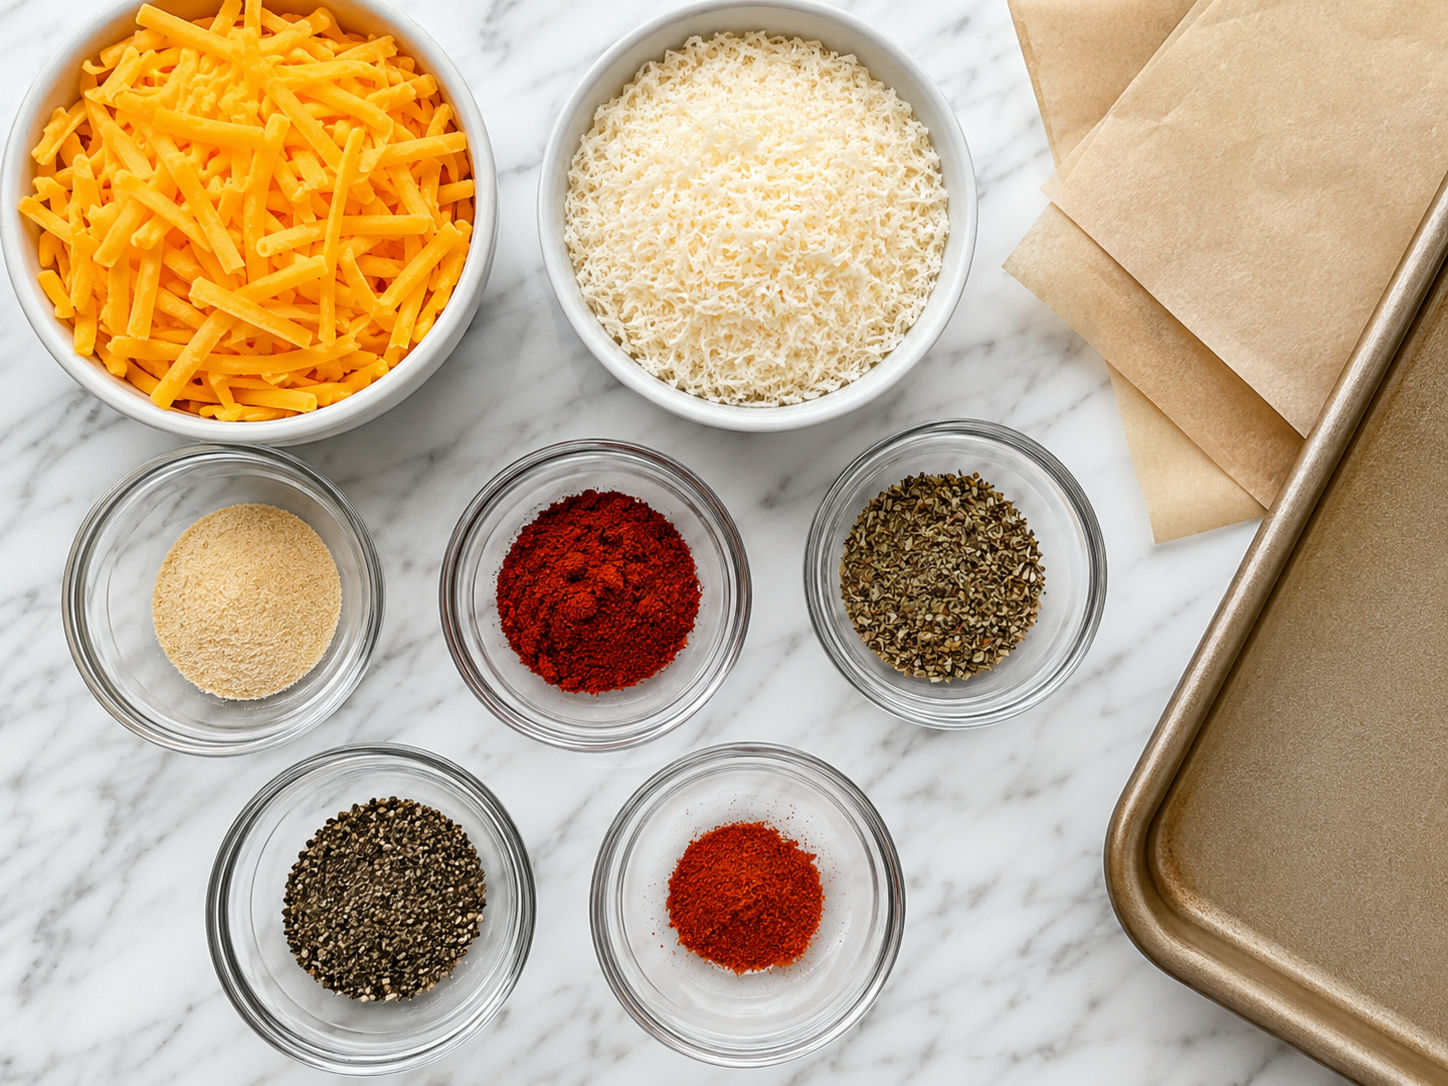
- Sharp cheddar. Adds bold flavor, orange color, and a rich melted-cheese finish.
- Parmesan. Helps the chips dry out and gives them a salty, lacy crunch.
- Garlic powder. Brings savory depth without adding moisture.
- Smoked paprika. Adds warm color and a light smoky note.
- Italian seasoning. Gives the chips a gentle herb flavor that pairs well with dips.
- Black pepper. Cuts through the richness and keeps each bite from tasting flat.
- Cayenne. Optional, but useful if you want a small kick at the finish.
Bake the Cheese Chips
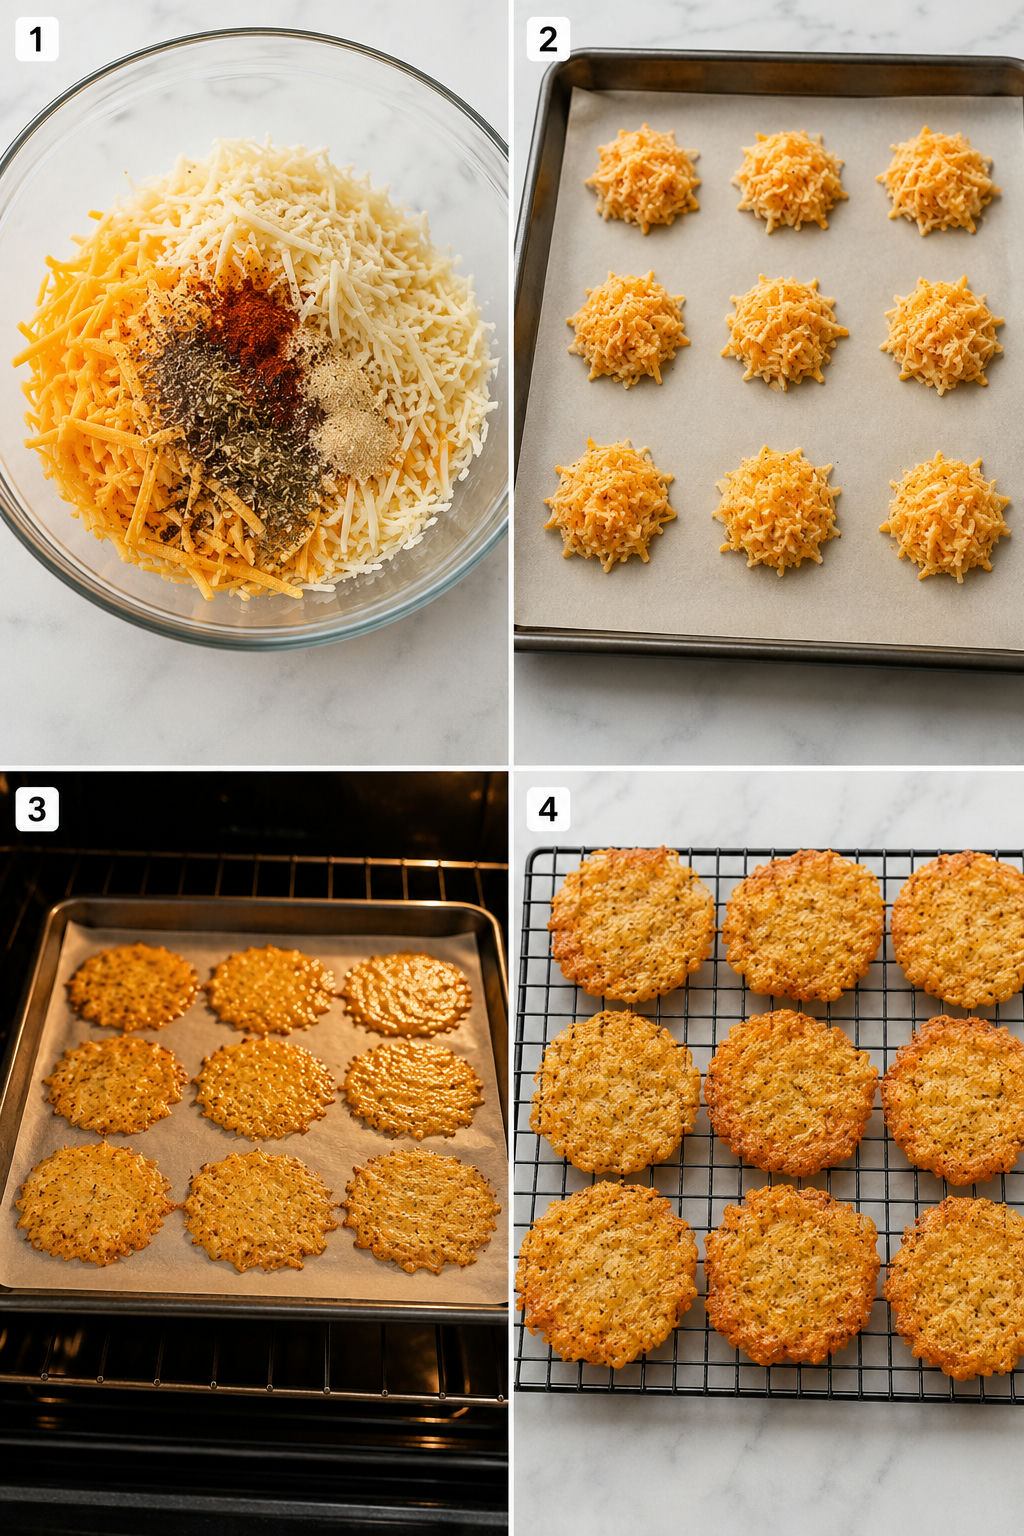
- Heat the oven. Set the oven to 400°F and line a large baking sheet with parchment paper. Skip foil because melted cheese sticks hard to it.
- Mix the cheese. Stir cheddar, Parmesan, garlic powder, paprika, Italian seasoning, pepper, and cayenne in a bowl until evenly combined.
- Make small piles. Drop tablespoon-sized mounds on the pan, spacing them about 2 inches apart. Flatten each mound slightly so the centers bake through.
- Bake until bubbly. Bake for 6-8 minutes, watching closely near the end. The chips are ready when the edges look golden and the bubbling slows.
- Cool until crisp. Let the chips rest on the pan for 5 minutes. Lift them with a thin spatula and move them to a rack or paper towel.
Thin Piles Matter Most
The difference between a crisp chip and a chewy cheese puddle is usually thickness. Keep each mound close to 1 tablespoon and press it into a loose circle. You should still see tiny gaps between shreds before baking. Those gaps help steam escape.
Cheese chips also need room. If the mounds touch, they bake into one sheet. That sheet tastes good, but it does not dip neatly. For a similar small-mound technique, compare the classic Parmesan crisps from Food Network, where the cheese is spooned out in small portions before baking.
Best Seasoning Moves
Seasoning works best when it is dry and finely ground. Garlic powder, paprika, ranch seasoning, taco seasoning, dried herbs, and chili flakes all work. Avoid fresh herbs before baking because they carry moisture and can darken before the cheese is crisp.
For a snack board, make one plain batch and one spicy batch. The plain chips are great with warm cheesy roasted tomato dip. The spicy ones can stand up to 3-ingredient chili cheese dip without tasting lost.
Cheddar Versus Parmesan
Cheddar melts wide and tastes bold. Parmesan melts less dramatically and dries into a firmer chip. Together they are easier than cheddar alone and less salty than all Parmesan. That is why this recipe uses more cheddar for flavor, then enough Parmesan to help the texture.
The cheddar-Parmesan approach is also common in baked cheese crisp recipes like the one from Wholesome Yum. The main cue is the same in my kitchen. Pull the pan when the edges are browned and the centers no longer look wet.
Serving Ideas That Fit
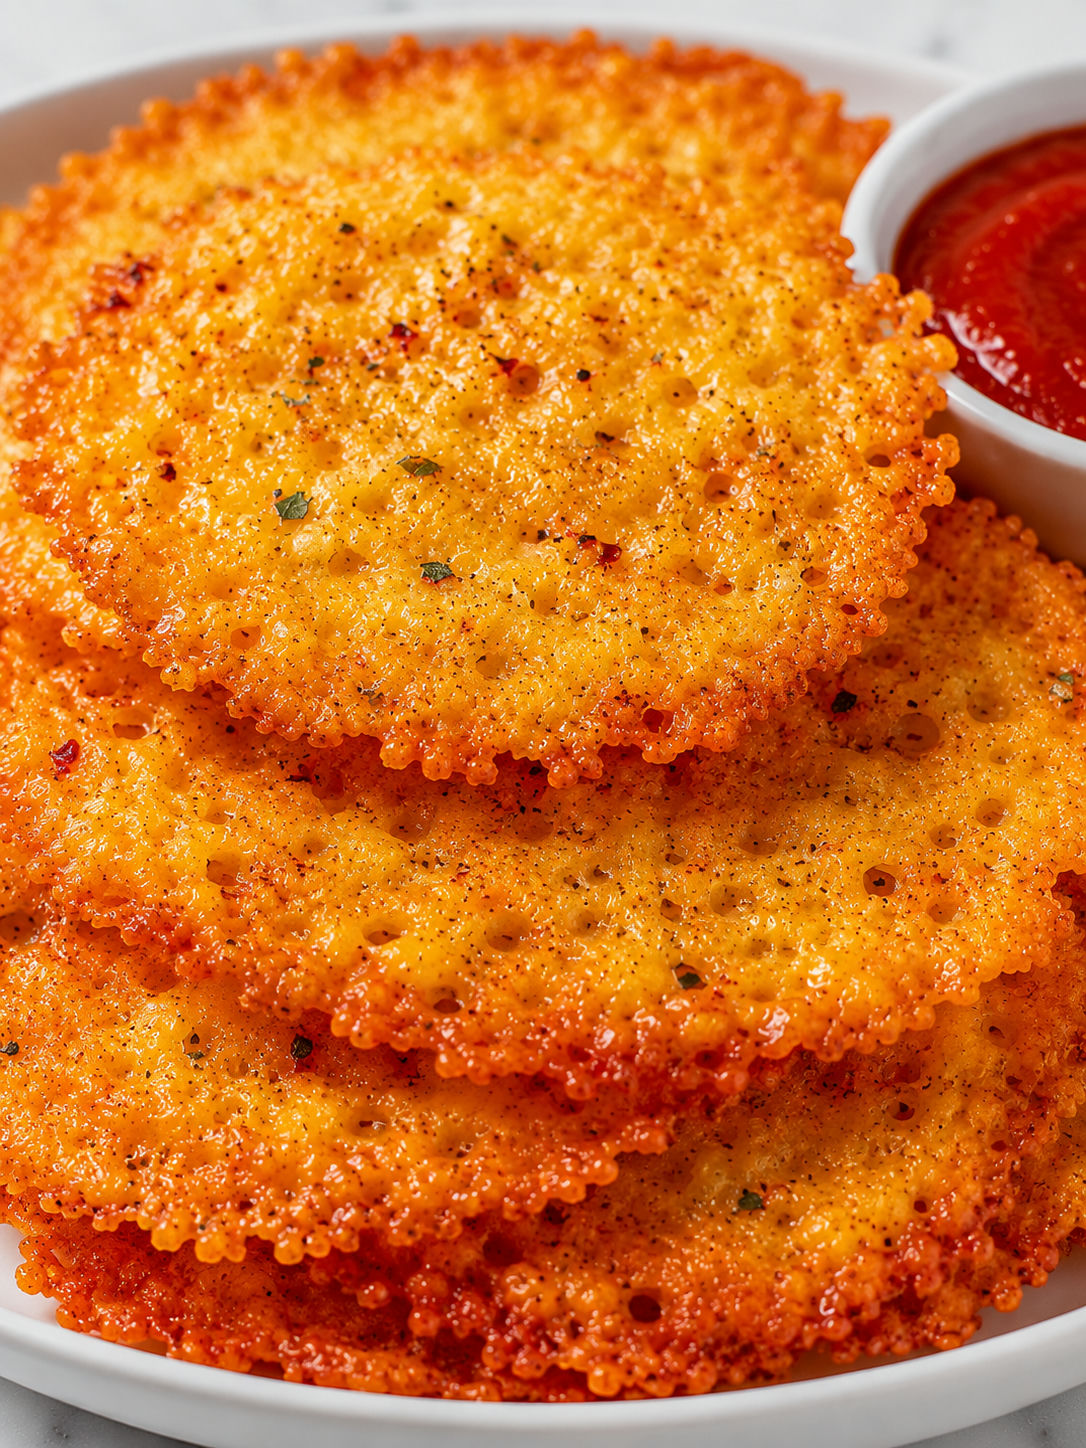
These chips are best fresh, while the centers are snappy and the edges taste toasted. Serve them beside a lunch bowl, crumble them over salad, or set them out with pickles and olives. They also make a crisp side for cheesy comfort food like Korean corn cheese.
If you want them for dipping, keep the dip thick. Watery salsa and thin sauces soften the chips quickly. A sturdy cheese chip can handle a scoop, but it is still melted cheese, not a tortilla chip.
Storing Without Losing Crunch
Let the chips cool fully before storing. Warm chips trapped in a container steam themselves soft. Once cool, refrigerate them in an airtight container with parchment between layers.
For general food storage, the FDA advises keeping refrigerated foods at or below 40°F and following the two-hour rule for perishable foods. You can read the full guidance in the FDA food storage guide. To bring back the crunch, place the chips on parchment and warm them at 325°F for a few minutes, then cool again.
Summary
Serve these chips fresh for the loudest crunch, or re-crisp leftovers in a low oven for a few minutes.
Frequently Asked Questions
- What cheese makes the crispiest baked cheese chips?
-
Parmesan is the most reliable for a dry, lacy crunch. Cheddar tastes richer but can stay chewy if the piles are too thick. A mix of both gives you flavor and a crisp texture.
- Can I use pre-shredded cheese?
-
Yes. Pre-shredded cheese works well here because it melts into neat little piles. Freshly grated cheese is also fine, but it can release more oil, so let the chips cool on paper towels if needed.
- Why are my cheese chips chewy?
-
They were probably too thick, underbaked, or moved before they cooled. Flatten each mound lightly and bake until the edges are golden. Let them sit on the pan for 5 minutes before lifting.
- How should I store baked cheese chips?
-
Cool them fully, then store them in an airtight container in the fridge for up to 3 days. They soften as they sit. Re-crisp them on parchment in a 325°F oven for 3-5 minutes.
- Can I make these without Parmesan?
-
You can use all cheddar, pepper jack, Swiss, or Colby. The chips may be a little softer than a Parmesan blend. Bake them until the edges are well browned and let them cool completely.
- What can I serve with cheese chips?
-
They are good with salsa, tomato dip, chili cheese dip, or tucked beside a salad for crunch. Keep wet dips on the side so the chips do not soften too fast.
