
 Pin it
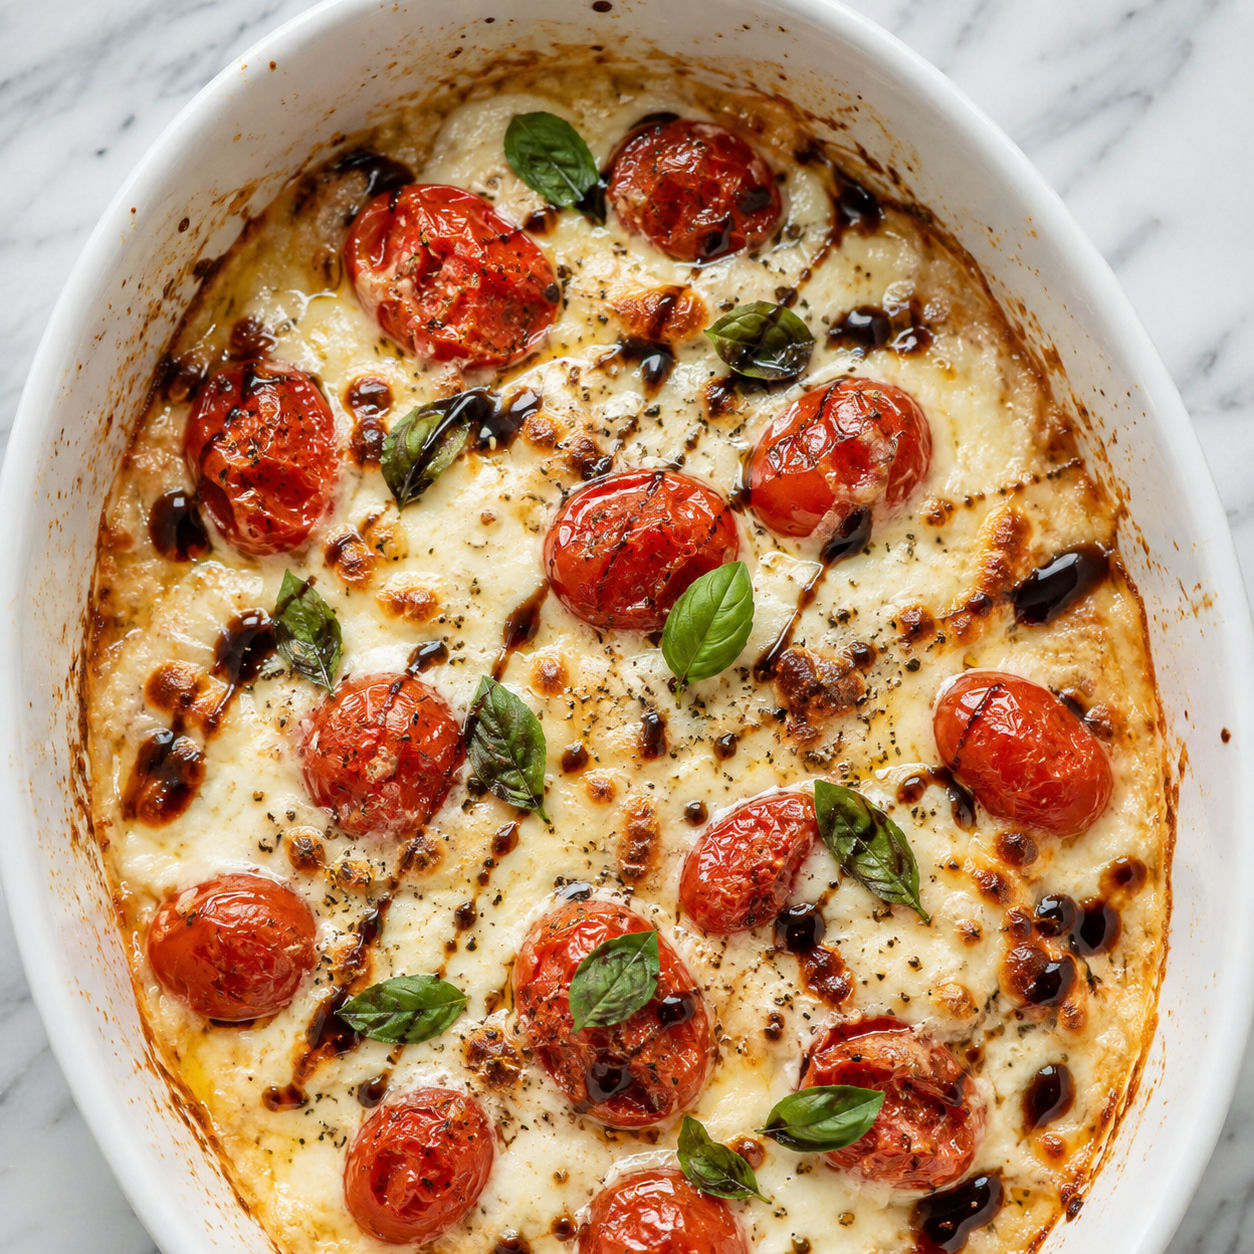
Baked Cheesy Tomato Dip is the warm appetizer I want on the table before anyone asks what is for dinner. The tomatoes collapse into their own garlicky juices while the cheese underneath turns soft, stretchy, and a little golden at the edges.
This version leans richer than a plain Boursin tomato bake. Mascarpone makes the base silky, mozzarella gives you the pull, and Parmesan keeps the dip from tasting flat. A small drizzle of balsamic glaze at the end wakes everything up.
Baked Cheesy Tomato Dip Lineup
Choose ripe cherry tomatoes that smell sweet and feel firm, not wrinkled. For the cheese, use full-fat mascarpone and low-moisture mozzarella so the dip bakes creamy instead of loose.
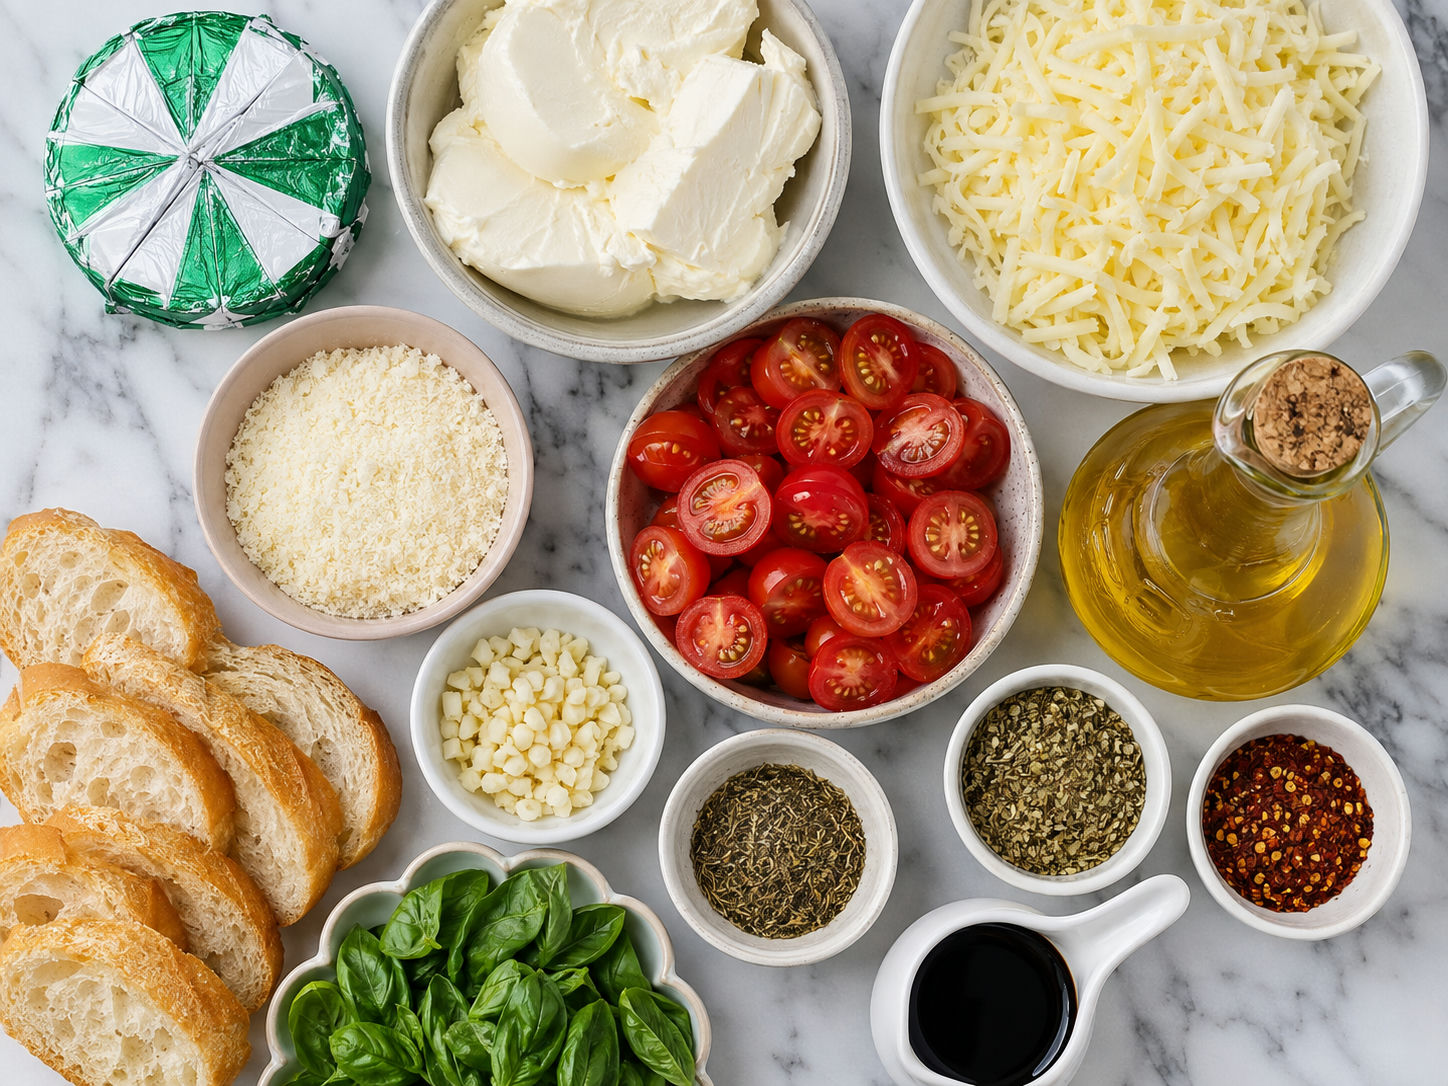
- Boursin cheese. Adds garlic, herbs, tang, and a creamy base with almost no prep.
- Mascarpone. Softens the sharpness of the herbed cheese and makes the dip silky.
- Cherry tomatoes. Roast into sweet, juicy pockets that cut through the richness.
- Garlic. Bakes into the tomato juices and gives the whole dish a savory backbone.
- Mozzarella. Gives the dip that stretchy, bubbly top everyone reaches for first.
- Parmesan. Adds saltiness and a browned edge without making the dip heavy.
- Italian herbs and chili flakes. Keep the flavor warm, savory, and lightly spicy.
- Basil and balsamic glaze. Go on after baking for freshness and a glossy sweet-tart finish.
Bake It Until Bubbling
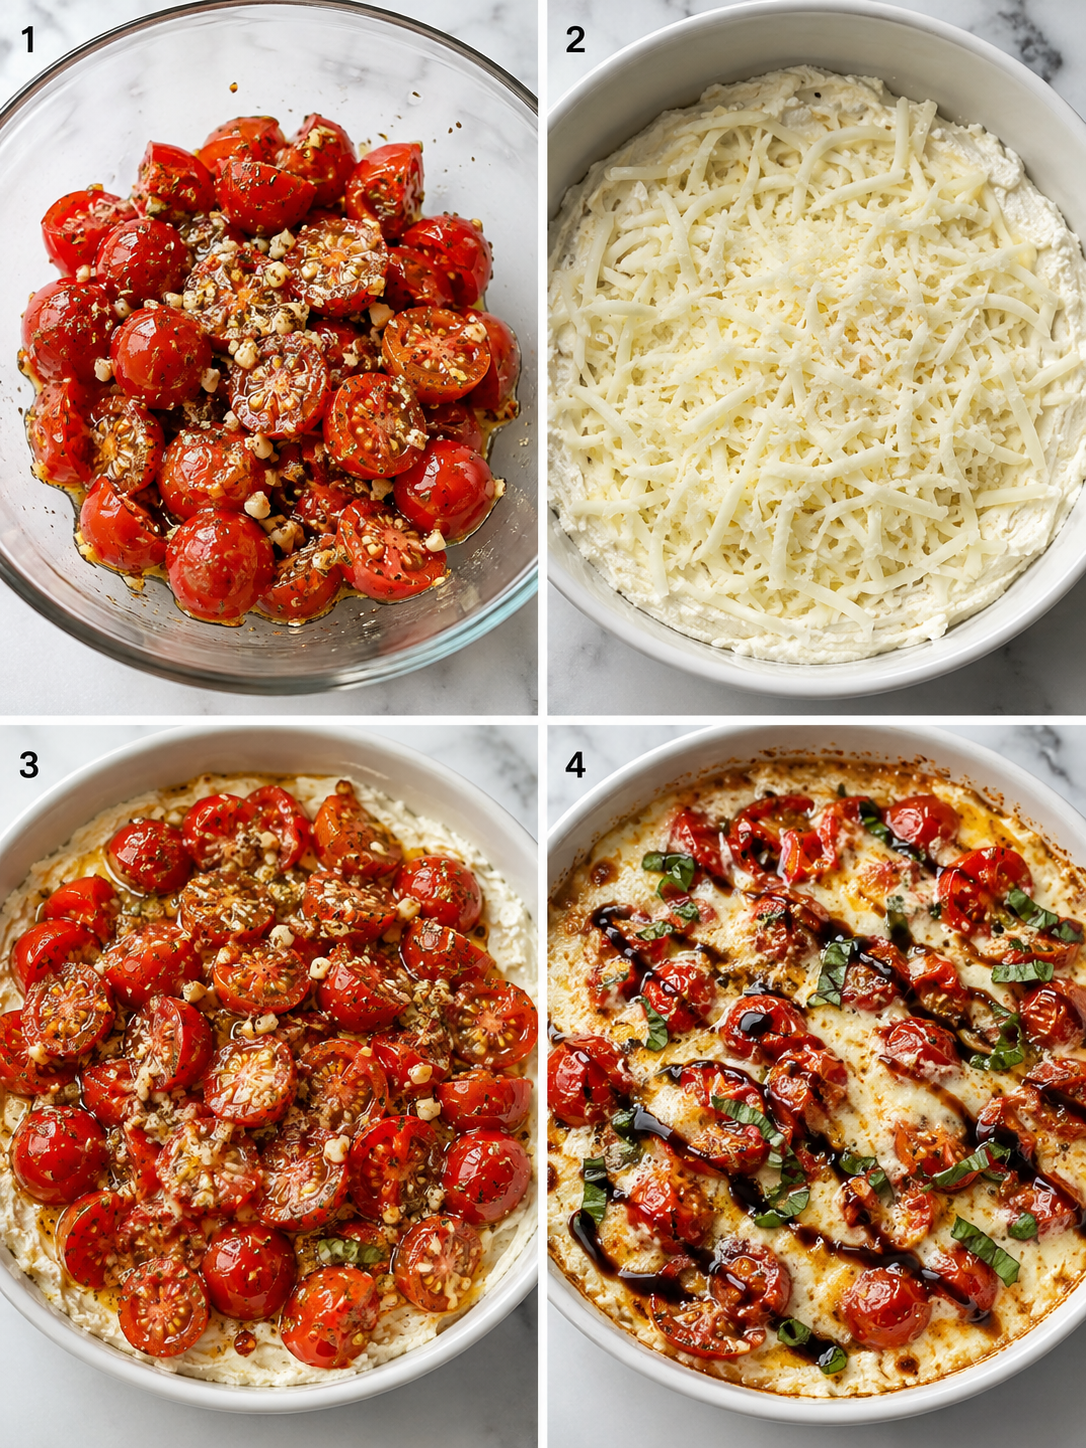
- Heat the oven. Set it to 375°F and place a rack in the center so the cheese warms before the top browns.
- Season the tomatoes. Toss halved cherry tomatoes with garlic, olive oil, Italian seasoning, oregano, chili flakes, salt, and pepper until every cut side looks glossy.
- Spread the cheese base. Stir the softened mascarpone and Boursin together in the baking dish, then spread it into an even layer.
- Add the melty top. Scatter mozzarella and Parmesan over the cheese base, then spoon the tomato mixture over everything.
- Bake and broil. Bake for 25-30 minutes until the tomatoes slump and the edges bubble. Broil for 1-2 minutes if you want a more golden top.
- Finish warm. Rest for 5 minutes, then add basil and balsamic glaze. Serve while the center is still creamy.
Why Tomatoes Stay On Top
Putting the tomatoes above the cheese does two useful things. First, the cut sides roast and soften without drowning the cheese base. Second, their juices drip down slowly, so you get pockets of sweet tomato instead of a thin pink sauce. The olive oil is not just there for shine. Cooking tomatoes with olive oil has been studied for lycopene availability, and you can read the research summary at PubMed. For cooking, the practical takeaway is simpler. Oil helps the tomatoes roast, carries the garlic, and keeps the surface from drying out.
Cheese Choices That Melt Cleanly
Boursin Garlic & Fine Herbs is the easiest choice because it already brings salt, garlic, and herbs. The brand uses the same tomato and olive oil pairing in its baked tomato recipe, which is why it works so well as a dip base too. Mascarpone makes the mixture plush, but cream cheese can step in if that is what you have. If you use cream cheese, let it soften fully and add a tablespoon of milk to loosen it. Skip fresh mozzarella here. It releases too much water. Low-moisture shredded mozzarella melts more predictably.
Build A Better Appetizer Table
This dip is rich, so serve it with things that crunch or taste bright. Toasted baguette slices are classic, but cucumber rounds and bell pepper strips are great when you want a lighter scoop. For a bigger spread, keep the warm cheese theme going with Cheesy Pizza Dip or set out 3-Ingredient Chili Cheese Dip for something spicier. If bread is part of the plan, slices of Cheddar Cheese Bread Loaf make this feel more like a casual supper than a snack.
Make Ahead Without Watery Edges
You can assemble the dish earlier in the day. Keep the tomato mixture on top, cover tightly, and refrigerate. Before baking, let the dish sit out for about 20 minutes so cold glass or ceramic does not go straight into a hot oven. Leftovers should be cooled and refrigerated promptly. The USDA says leftovers should not sit out longer than 2 hours and should be kept in shallow covered containers, see the USDA leftovers guide. Reheat the dip gently at 325°F until warm, then stir once before serving.
Small Fixes For Big Texture
If the dip looks oily when it comes out, do not panic. Cheese fat can pool at the edges when the dish is very hot. Let it stand, then swirl the tomatoes through the cheese with a small spoon. If it tastes flat, it probably needs acid, not salt. Add a little more balsamic glaze or a few drops of lemon juice. If you want a tomato dip with a slightly different roasted flavor, this one sits nicely beside our Warm Cheesy Roasted Tomato Dip. The two are close cousins, but this version is creamier and more bruschetta-style.
Frequently Asked Questions
- Can I make Baked Cheesy Tomato Dip ahead of time?
-
Yes. Assemble the cheese layer and tomato topping in the baking dish, cover it, and refrigerate for up to 8 hours. Let it sit on the counter for about 20 minutes before baking so the center heats evenly.
- What can I use instead of mascarpone?
-
Softened cream cheese works well and makes the dip a little tangier. Whole-milk ricotta also works, but drain it first so the cheese layer does not turn watery.
- Can I use grape tomatoes instead of cherry tomatoes?
-
Yes. Grape tomatoes are a good swap because they hold their shape and roast nicely. Halve them first so their juices mix into the cheese instead of staying trapped inside the skins.
- How do I keep the dip from getting greasy?
-
Use low-moisture mozzarella and do not add extra oil beyond what the tomatoes need. Let the dip rest for 5 minutes after baking, then gently swirl the tomato juices back into the cheese before serving.
- What should I serve with cheesy tomato dip?
-
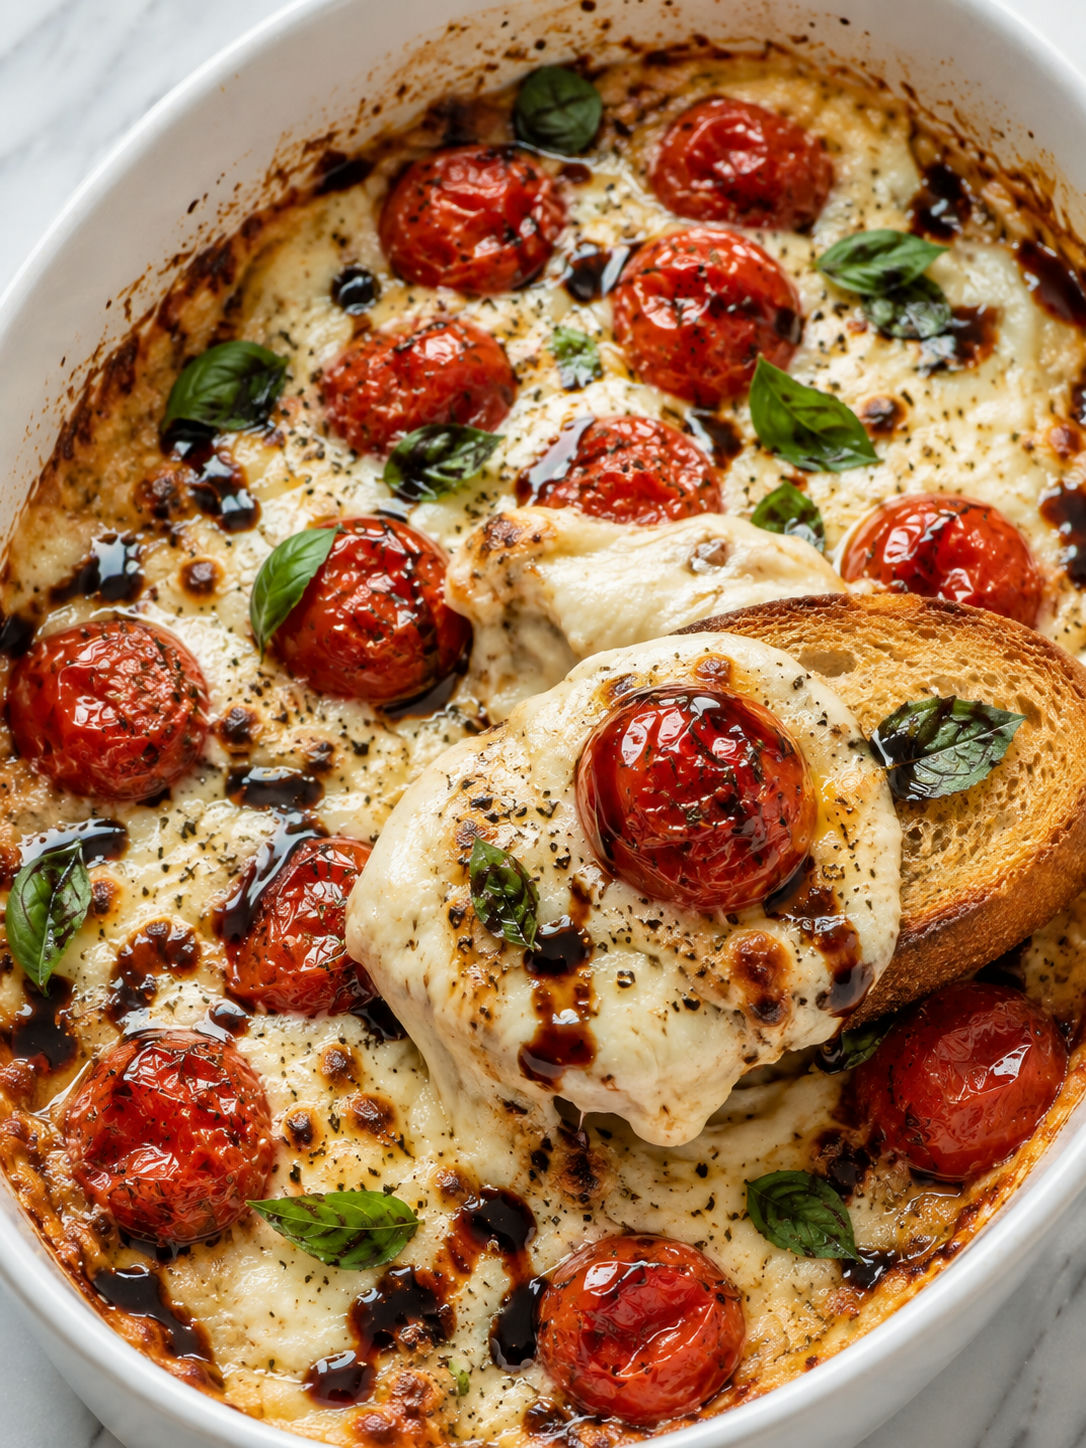
Toasted baguette slices are the easiest choice because they are sturdy. Crackers, pita chips, garlic bread, cucumber rounds, and bell pepper strips all work too.
- Can I double this recipe for a party?
-
Yes. Use a 9x13-inch baking dish and keep the tomato layer fairly even. Start checking around 30 minutes, then broil briefly only if the top needs more color.
